 Loading... Please wait...
Categories
- Home
- Hatch Covers and Rims
- Kajak Sport Round Hatch Rim 24
- Home
- Hatch Covers and Rims
- Kajak Sport Rims
- Kajak Sport Round Hatch Rim 24
Product Description
The KS-hatch rims are precision-made for KS-hatch covers. The rim is made of durable and gluable ABS-plastic. Using this cover together with Kajak Sport rims you can have the best possible water tightness and easy access to your kayak cargo space. This hatch rim can basically be attached to all kayaks (e.g. fibreglass, reinforced plastics, polyethylene mixtures, ABS plastic etc). Before gluing, find out and confirm suitable glue and primer for both materials. The installation instruction for most common materials are below.
For use with the Kajak Sport 24 Hatch Cover - we stock the LRC and Click on covers
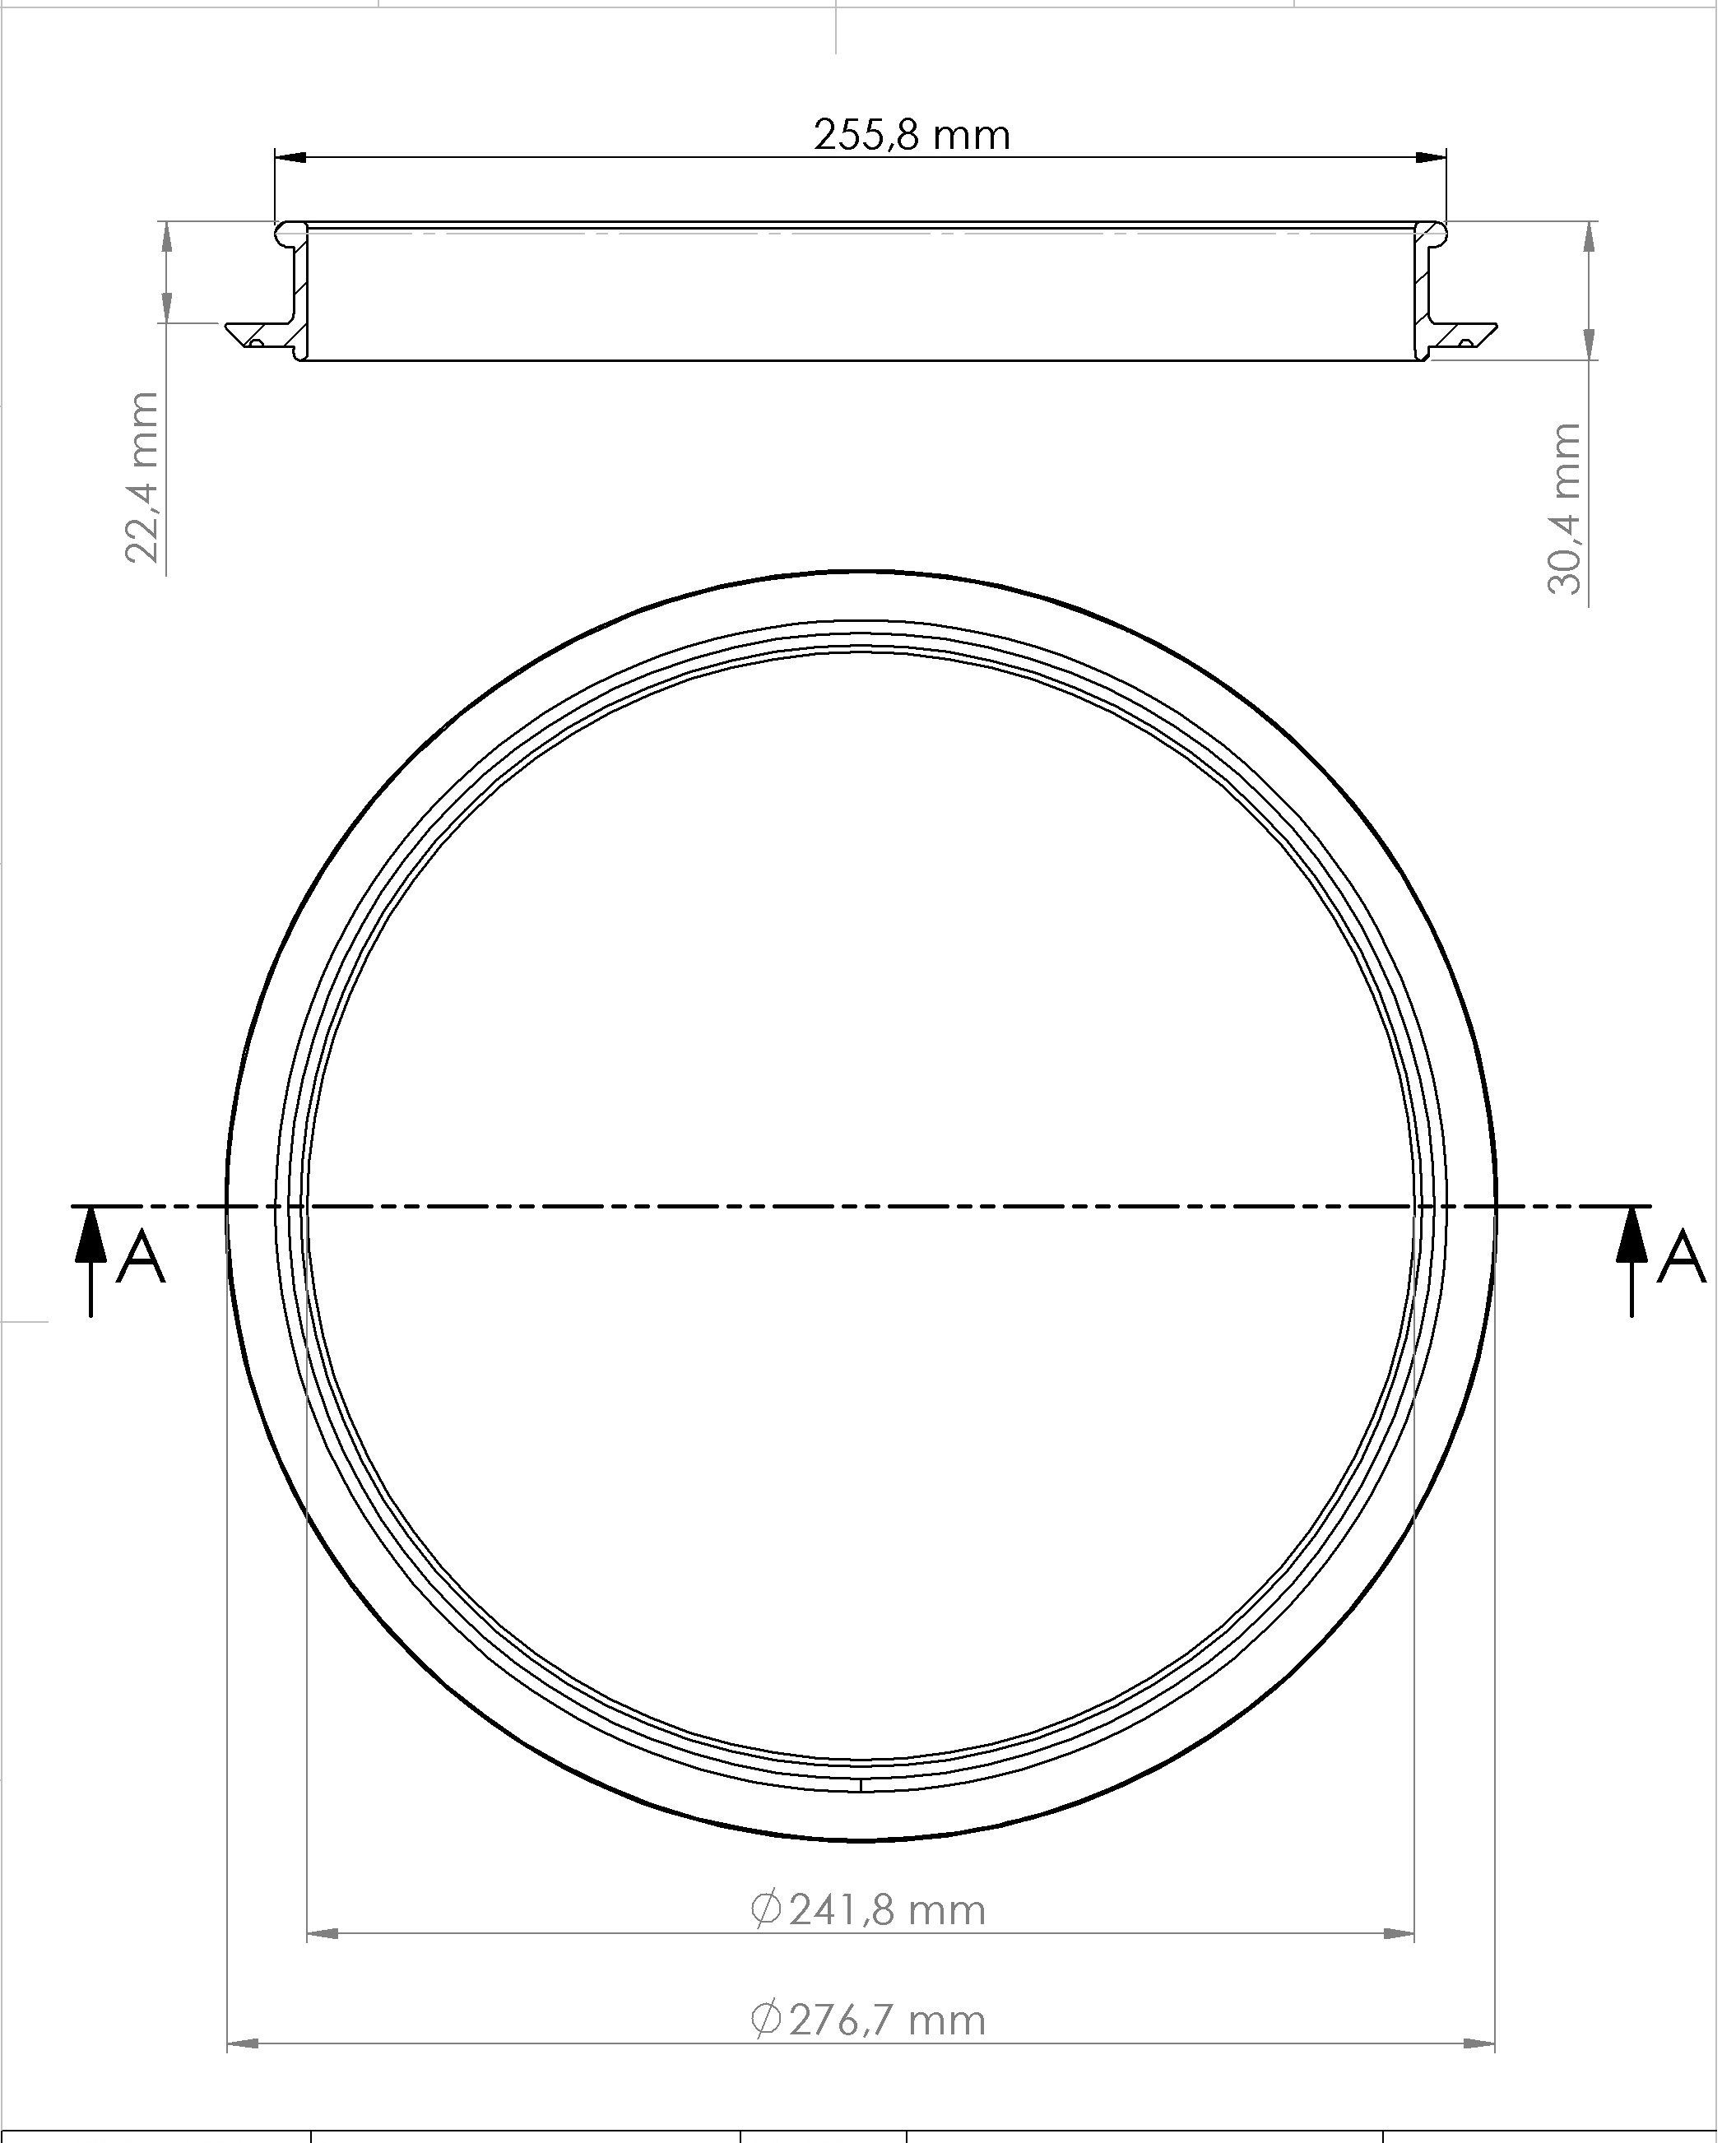
Please check the dimensions below (or on the zoomable image) to ensure that this product will fit your hatch opening.
Dimensions:
| Weight: | 128g |
| Width: | 279g |
| Height: | 30mm |

INSTRUCTIONS:
Measuring to ensure correct fit:

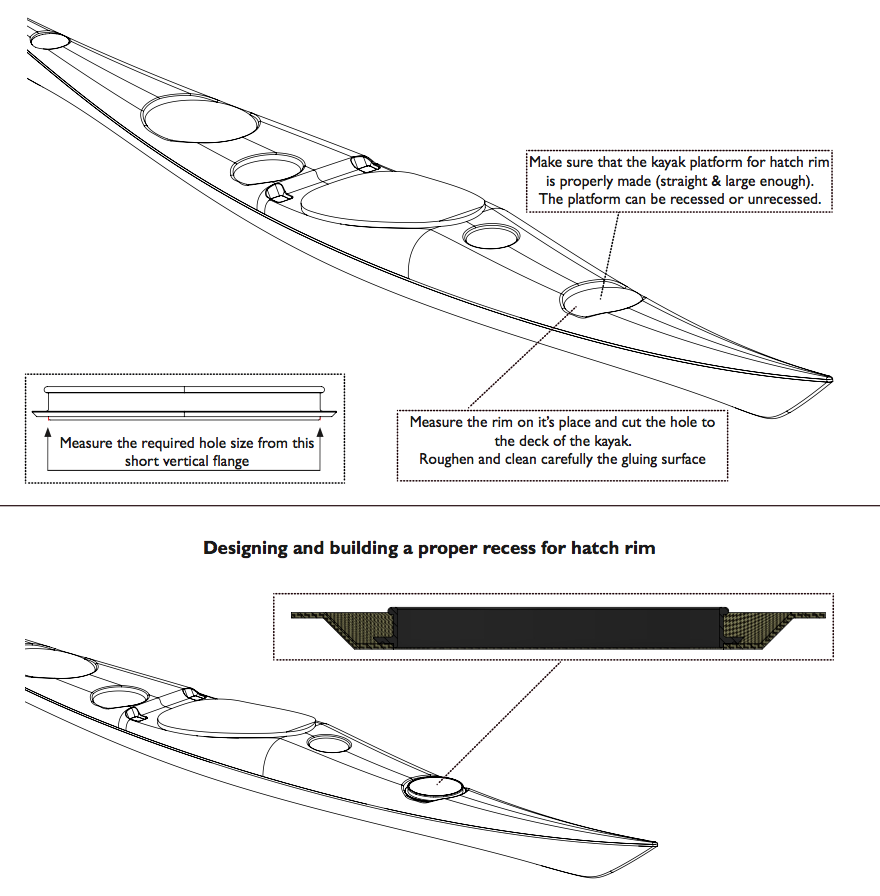
Check the dimensions above for the rim to make sure it will fit where you want to install it. Make sure there is enough free space around the hatch rim so that the deck won’t disturb the usage of the hatch cover. The cover needs to be able to stretch and bend over the outer edge of the rim. The user needs to get good grip with fingers around the cover. Recess needs to have proper emptying channel for water.
Fitting the hatch to your kayak:
Kajak-Sport hatch rims are made of ABS-plastic.
Therefore the rims are easily glueable with many different adhesives as well as to many various materials. Kajak-Sport gluing instruction is based on Sika sealants. If you use another sealant, please check the manufacturers instructions and make sure the sealant is suitable for ABS-plastic.
Using Sika Primer (e.g. 215 or 290DC) with ABS material is highly recommended to assure perfect bonding with Sika polyurethane adhesive/ sealant. Apply primer to a clean ABS rim, wipe once the gluing surface of the rim.
Let the primer dry at least 30 min before gluing but not more than 20 hours.
Use polyurethane adhesive/sealant, e.g. Sika ex-221 for gluing. Spread the glue to the glueable surface of the kayak deck. Press the rim to its place and let dry.
To strengthen the joint between the deck and the rim, you can use rivets (particularly with bigger hatches). These will help the rim to stay in place if kayak needs to be moved on curing time. Be careful with the rivets in order to prevent the rim from breaking! Make sure the rim is not budged during the drying.
PolyEthylene Kayaks:
If you install the rim to a PE-kayak, flame the surface of the kayak from the gluing area carefully with a torch to make sure of a better binding of the sealant. It’s not recommended to flame the hatch rim at all, it may weaken the structure of ABS material.


